Friday, December 5, 2014

pointer acceleration in libinput - building a DPI database for mice

click here to jump to the instructions

Mice have an optical sensor that tells them how far they moved in "mickeys". Depending on the sensor, a mickey is anywhere between 1/100 to 1/8200 of an inch or less. The current "standard" resolution is 1000 DPI, but older mice will have 800 DPI, 400 DPI etc. Resolutions above 1200 DPI are generally reserved for gaming mice with (usually) switchable resolution and it's an arms race between manufacturers in who can advertise higher numbers.

HW manufacturers are cheap bastards so of course the mice don't advertise the sensor resolution. Which means that for the purpose of pointer acceleration there is no physical reference. That delta of 10 could be a millimeter of mouse movement or a nanometer, you just can't know. And if pointer acceleration works on input without reference, it becomes useless and unpredictable. That is partially intended, HW manufacturers advertise that a lower resolution will provide more precision while sniping and a higher resolution means faster turns while running around doing rocket jumps. I personally don't think that there's much difference between 5000 and 8000 DPI anymore, the mouse is so sensitive that if you sneeze your pointer ends up next to Philae. But then again, who am I to argue with marketing types.

For us, useless and unpredictable is bad, especially in the use-case of everyday desktops. To work around that, libinput 0.7 now incorporates the physical resolution into pointer acceleration. And to do that we need a database, which will be provided by udev as of systemd 218 (unreleased at the time of writing). This database incorporates the various devices and their physical resolution, together with their sampling rate. udev sets the resolution as the MOUSE_DPI property that we can read in libinput and use as reference point in the pointer accel code. In the simplest case, the entry lists a single resolution with a single frequency (e.g. "MOUSE_DPI=1000@125"), for switchable gaming mice it lists a list of resolutions with frequencies and marks the default with an asterisk ("MOUSE_DPI=400@50 800@50 *1000@125 1200@125"). And you can and should help us populate the database so it gets useful really quickly.

How to add your device to the database

We use udev's hwdb for the database list. The upstream file is in /usr/lib/udev/hwdb.d/70-mouse.hwdb, the ruleset to trigger a match is in /usr/lib/udev/rules.d/70-mouse.rules. The easiest way to add a match is with the libevdev mouse-dpi-tool (version 1.3.2). Run it and follow the instructions. The output looks like this:

$ sudo ./tools/mouse-dpi-tool  /dev/input/event8
Mouse Lenovo Optical USB Mouse on /dev/input/event8
Move the device along the x-axis.
Pause 3 seconds before movement to reset, Ctrl+C to exit.
Covered distance in device units:      264 at frequency 125.0Hz |       |^C
Estimated sampling frequency: 125Hz
To calculate resolution, measure physical distance covered
and look up the matching resolution in the table below
      16mm     0.66in      400dpi
      11mm     0.44in      600dpi
       8mm     0.33in      800dpi
       6mm     0.26in     1000dpi
       5mm     0.22in     1200dpi
       4mm     0.19in     1400dpi
       4mm     0.17in     1600dpi
       3mm     0.15in     1800dpi
       3mm     0.13in     2000dpi
       3mm     0.12in     2200dpi
       2mm     0.11in     2400dpi

Entry for hwdb match (replace XXX with the resolution in DPI):
mouse:usb:v17efp6019:name:Lenovo Optical USB Mouse:
 MOUSE_DPI=XXX@125
Take those last two lines, add them to a local new file /etc/udev/hwdb.d/71-mouse.hwdb. Rebuild the hwdb, trigger it, and done:
$ sudo udevadm hwdb --update
$ sudo udevadm trigger /dev/input/event8
Leave out the device path if you're not on systemd 218 yet. Check if the property is set:
$ udevadm info /dev/input/event8 | grep MOUSE_DPI
E: MOUSE_DPI=1000@125
And that shows everything worked. Restart X/Wayland/whatever uses libinput and you're good to go. If it works, double-check the upstream instructions, then file a bug against systemd with those two lines and assign it to me.

Trackballs are a bit hard to measure like this, my suggestion is to check the manufacturer's website first for any resolution data.

Update 2014/12/06: trackball comment added, udevadm trigger comment for pre 218
Update 2015/08/26: udpated link to systemd bugzilla (now on github)

Monday, December 1, 2014

Why the 255 keycode limit in X is a real problem

A long-standing and unfixable problem in X is that we cannot send a number of keys to clients because their keycode is too high. This doesn't affect any of the normal keys for typing, but a lot of multimedia keys, especially "newly" introduced ones.

X has a maximum keycode 255, and "Keycodes lie in the inclusive range [8,255]". The reason for the offset 8 keeps escaping me but it doesn't matter anyway. Effectively, it means that we are limited to 247 keys per keyboard. Now, you may think that this would be enough and thus the limit shouldn't really affect us. And you're right. This post explains why it is a problem nonetheless.

Let's discard any ideas about actually increasing the limit from 8 bit to 32 bit. It's hardwired into too many open-coded structs that this is simply not an option. You'd be breaking every X client out there, so at this point you might as well rewrite the display server and aim for replacing X altogether. Oh wait...

So why aren't 247 keycodes enough? The reason is that large chunks of that range are unused and wasted.

In X, the keymap is an array in the form keysyms[keycode] = some keysym (that's a rather simplified view, look at the output from "xkbcomp -xkb $DISPLAY -" for details). The actual value of the keycode doesn't matter in theory, it's just an index. Of course, that theory only applies when you're looking at one keyboard at a time. We need to ship keymaps that are useful everywhere (see xkeyboard-config) and for that we need some sort of standard. In the olden days this meant every vendor had their own keycodes (see /usr/share/X11/xkb/keycodes) but these days Linux normalizes it to evdev keycodes. So we know that KEY_VOLUMEUP is always 115 and we can hook it up thus to just work out of the box. That however leaves us with huge ranges of unused keycodes because every device is different. My keyboard does not have a CD eject key, but it has volume control keys. I have a key to start a web browser but I don't have a key to start a calculator. Others' keyboards do have those keys though, and they expect those keys to work. So the default keymap needs to map the possible keycodes to the matching keysyms and suddenly our 247 keycodes per keyboard becomes 247 for all keyboards ever made. And that is simply not enough.

To work around this, we'd need locally hardware-adjusted keymaps generated at runtime. After loading the driver we can look at the keys that exist, remap higher keycodes into an unused range and then communicate that to move the keysyms into the newly mapped keycodes. This is...complicated. evdev doesn't know about keymaps. When gnome-settings-daemon applied your user-specific layout, evdev didn't get told about this. GNOME on the other hand has no idea that evdev previously re-mapped higher keycodes. So when g-s-d applies your setting, it may overwrite the remapped keysym with the one from the default keymaps (and evdev won't notice).

As usual, none of this is technically unfixable. You could figure out a protocol extension that drivers can talk to the servers and the clients to notify them of remapped keycodes. This of course needs to be added to evdev, the server, libX11, probably xkbcomp and libxkbcommon and of course to all desktop environments that set they layout. To write the patches you need a deep understanding of XKB which would definitely make your skillset a rare one, probably make you quite employable and possibly put you on the fast track for your nearest mental institution. XKB and happiness don't usually go together, but at least the jackets will keep you warm.

Because of the above, we go with the simple answer: "X can't handle keycodes over 255"

Wednesday, November 12, 2014

Analysing input events with evemu

Over the last couple of years, we've put some effort into better tooling for debugging input devices. Benjamin's hid-replay is an example for a low-level tool that's great for helping with kernel issues, evemu is great for userspace debugging of evdev devices. evemu has recently gained better Python bindings, today I'll explain here how those make it really easy to analyse event recordings.

Requirement: evemu 2.1.0 or later

The input needed to make use of the Python bindings is either a device directly or an evemu recordings file. I find the latter a lot more interesting, it enables me to record multiple users/devices first, and then run the analysis later. So let's go with that:

$ sudo evemu-record > mouse-events.evemu
Available devices:
/dev/input/event0: Lid Switch
/dev/input/event1: Sleep Button
/dev/input/event2: Power Button
/dev/input/event3: AT Translated Set 2 keyboard
/dev/input/event4: SynPS/2 Synaptics TouchPad
/dev/input/event5: Lenovo Optical USB Mouse
Select the device event number [0-5]: 5
That pipes any event from the mouse into the file, to be terminated by ctrl+c. It's just a text file, feel free to leave it running for hours.

Now for the actual analysis. The simplest approach is to read all events from a file and print them:

#!/usr/bin/env python

import sys
import evemu

filename = sys.argv[1]
# create an evemu instance from the recording,
# create=False means don't create a uinput device from it
d = evemu.Device(filename, create=False)

for e in d.events():
    print e
That prints out all events, so the output should look identical to the input file's event list. The output you should see is something like:
E: 7.817877 0000 0000 0000 # ------------ SYN_REPORT (0) ----------
E: 7.821887 0002 0000 -001 # EV_REL / REL_X                -1
E: 7.821903 0000 0000 0000 # ------------ SYN_REPORT (0) ----------
E: 7.825872 0002 0000 -001 # EV_REL / REL_X                -1
E: 7.825879 0002 0001 -001 # EV_REL / REL_Y                -1
E: 7.825883 0000 0000 0000 # ------------ SYN_REPORT (0) ----------

The events are an evemu.InputEvent object, with the properties type, code, value and the timestamp as sec, usec accessible (i.e. the underlying C struct). The most useful method of the object is InputEvent.matches(type, code) which takes both integer values and strings:

if e.matches("EV_REL"):
   print "this is a relative event of some kind"
elif e.matches("EV_ABS", "ABS_X"):
   print "absolute X movement"
elif e.matches(0x03, 0x01):
   printf "absolute Y movement"

A practical example: let's say we want to know the maximum delta value our mouse sends.


import sys
import evemu

filename = sys.argv[1]
# create an evemu instance from the recording,
# create=False means don't create a uinput device from it
d = evemu.Device(filename, create=False)

if not d.has_event("EV_REL", "REL_X") or \
   not d.has_event("EV_REL", "REL_Y"):
   print "%s isn't a mouse" % d.name
   sys.exit(1)

deltas = []

for e in d.events():
    if e.matches("EV_REL", "REL_X") or \
        e.matches("EV_REL", "REL_Y"):
        deltas.append(e.value)

max = max([abs(x) for x in deltas])
print "Maximum delta is %d" % (max)
And voila, with just a few lines of code we've analysed a set of events. The rest is up to your imagination. So far I've used scripts like this to help us implement palm detection, figure out ways how to deal with high-DPI mice, estimate the required size for top softwarebuttons on touchpads, etc.

Especially for printing event values, a couple of other functions come in handy here:

type = evemu.event_get_value("EV_REL")
code = evemu.event_get_value("EV_REL", "REL_X")

strtype = evemu.event_get_name(type)
strcode = evemu.event_get_name(type, code)
They do what you'd expect from them, and both functions take either strings and actual types/codes as numeric values. The same exists for input properties.

Tuesday, November 11, 2014

Wacom Intuos Creative Stylus 2 and the missing support on Linux

The following was debugged and discovered by Benjamin Tissoires, I'm merely playing the editor and publisher. All credit and complimentary beverages go to him please.

Wacom recently added two interesting products to its lineup: the Intuos Creative Stylus 2 and the Bamboo Stylus Fineline. Both are styli only, without the accompanying physical tablet and they are marketed towards the Apple iPad market. The basic idea here is that touch location is provided by the system, the pen augments that with buttons, pressure and whatever else. The tips of the styli are 2.9mm (Creative Stylus 2) and 1.9mm (Bamboo Fineline), so definitely smaller than your average finger, and smaller than most other touch pens. This could of course be useful for any touch-capable Linux laptop, it's a cheap way to get an artist's tablet. The official compatibility lists the iPads only, but then that hasn't stopped anyone in the past.

We enjoy a good relationship with the Linux engineers at Wacom, so naturally the first thing was to ask if they could help us out here. Unfortunately, the answer was no. Or more specifically (and heavily paraphrased): "those devices aren't really general purpose, so we wouldn't want to disclose the spec". That of course immediately prompted Benjamin to go and buy one.

From Wacom's POV not disclosing the specs makes sense and why will become more obvious below. The styli are designed for a specific use-case, if Wacom claims that they can work in any use-case they have a lot to lose - mainly from the crowd that blames the manufacturer if something doesn't work as they expect. Think of when netbooks were first introduced and people complained that they weren't full-blown laptops, despite the comparatively low price...

The first result: the stylus works on most touchscreens (and Benjamin has a few of those) but not on all of them. Specifically, the touchscreen on the Asus N550JK didn't react to it. So that's warning number 1: it may not work on your specific laptop and you probably won't know until you try.

Pairing works, provided you have a Bluetooth 4.0 chipset and your kernel supports it (tested on 3.18-rc3). Problem is: you can connect the device but you don't get anything out of it. Why? Bluetooth LE. Let's expand on that: Bluetooth LE uses the Generic Attribute Profile (GATT). The actual data is divided into Profiles, Services and Characteristics, which are clearly named by committee and stand for the general topic, subtopic/item and data point(s). So in the example here the Profile is Heart Rate Profile, the Service is Heart Rate Measurement and the Characteristic is the actual count of "lub-dub" on your ticker [1]. All are predefined. Again, why does this matter? Because what we're hoping for is the Hid Service or the Hid over GATT Service service. In both cases we could then use the kernel's uhid module to get the stylus to work. Alas, the actual output of the device is:

[bluetooth]# info C5:37:E8:73:57:BE
Device C5:37:E8:73:57:BE
      Name: Stylus1
      Alias: Stylus1
      Appearance: 0x0341
      Paired: yes
      Trusted: yes
      Blocked: no
      Connected: yes
      LegacyPairing: no
      UUID: Vendor specific (00001523-1212-efde-1523-785feabcd123)
      UUID: Generic Access Profile (00001800-0000-1000-8000-00805f9b34fb)
      UUID: Generic Attribute Profile (00001801-0000-1000-8000-00805f9b34fb)
      UUID: Device Information (0000180a-0000-1000-8000-00805f9b34fb)
      UUID: Battery Service (0000180f-0000-1000-8000-00805f9b34fb)
      UUID: Vendor specific (6e400001-b5a3-f393-e0a9-e50e24dcca9e)
      Modalias: usb:v056Ap0329d0001
So we can see GAP and GATT, Device Information and Battery Service (both predefined) and 2 Vendor specific profiles (i.e. "magic fairy dust"). And this is where Benjamin got stuck - each of these may have a vendor-specific handshake, protocol, etc. And it's not even sure he'll be able to set the device up so it talks to him. So warning number 2: you can see and connect the device, but it'll talk gibberish (or nothing).

Now, it's probably possible to reverse engineer that if you have sufficient motivation. We don't. The Bluetooth spec is available though, once you work your way through that you can start working on the vendor specific protocol which we know nothing about.

Last but not least: the userspace component. The device itself is not ready-to-use, it provides pressure but you'd still have to associate it with the right touch point. That's not trivial, especially in the presence of other touch points (the outside of your hand while using the stylus for example). So we'd need to add support for this in the X drivers and libinput to make it work. Wacom and/or OS X presumably solved this for iPads, but even there it doesn't just work. The applications need to support it and "You do have to do some digging to figure out to connect the stylus to your favorite art apps -- it's a different procedure for each one, but that's common among these styluses." That's something we wouldn't do the same way on the Linux desktop. So warning number 3: if you can make the kernel work, it won't work as you expect in userspace, and getting it to work is a huge task.

Now all that pretty much boils down to: is it worthwhile? Our consensus so far was "no". I guess Wacom was right in holding back the spec after all. These devices won't work on any tablet and even if they would, we don't have anything in the userspace stack to actually support them properly. So in summary: don't buy the stylus if you plan to use it in Linux.

[1] lub-dub is good. ta-lub-dub is not. you don't want lub-dub-ta. wikipedia

Wednesday, September 24, 2014

libinput - a common input stack for Wayland compositors and X.Org drivers

Last November, Jonas Ã…dahl sent an RFC to the wayland-devel list about a common library to handle input devices in Wayland compositors called libinput. Fast-forward and we are now at libinput 0.6, with a broad support of devices and features. In this post I'll give an overview on libinput and why it is necessary in the first place. Unsuprisingly I'll be focusing on Linux, for other systems please mentally add the required asterisks, footnotes and handwaving.

The input stack in X.org

The input stack as it currently works in X.org is a bit of a mess. I'm not even talking about the different protocol versions that we need to support and that are partially incompatible with each other (core, XI 1.x, XI2, XKB, etc.), I'm talking about the backend infrastructure. Let's have a look:

The graph above is a simplification of the input stack, focusing on the various high-level functionalities. The X server uses some device discovery mechanism (udev now, previously hal) and matches each device with an input driver (evdev, synaptics, wacom, ...) based on the configuration snippets (see your local /usr/share/X11/xorg.conf.d/ directory).

The idea of having multiple drivers for different hardware was great when hardware still mattered, but these days we only speak evdev and the drivers that are hardware-specific are racing the dodos to the finishing line.

The drivers can communicate with the server through the very limited xf86 DDX API, but there is no good mechanism to communicate between the drivers. It's possible, just not doable in a sane manner. Most drivers support multiple X server releases so any communication between drivers would need to take version number mixes into account. Only the server knows the drivers that are loaded, through a couple of structs. Knowledge of things like "which device is running synaptics" is obtainable, but not sensibly. Likewise, drivers can get to the drivers of other devices, but not reasonably so (the API is non-opaque, so you can get to anything if you find the matching header).

Some features are provided by the X server: pointer acceleration, disabling a device, mapping a device to monitor, etc. Most other features such as tapping, two-finger scrolling, etc. are provided by the driver. That leads to an interesting feature support matrix: synaptics and wacom both provide two-finger scrolling, but only synaptics has edge-scrolling. evdev and wacom have calibration support but they're incompatible configuration options, etc. The server in general has no idea what feature is being used, all it sees is button, motion and key events.

The general result of this separation is that of a big family gathering. It looks like a big happy family at first, but then you see that synaptics won't talk to evdev because of the tapping incident a couple of years back, mouse and keyboard are have no idea what forks and knives are for, wacom is the hippy GPL cousin that doesn't even live in the same state and no-one quite knows why elographics keeps getting invited. The X server tries to keep the peace by just generally getting in the way of everyone so no-one can argue for too long. You step back, shrug apologetically and say "well, that's just how these things are, right?"

To give you one example, and I really wish this was a joke: The server is responsible for button mappings, tapping is implemented in synaptics. In order to support left-handed touchpads, gnome-settings-daemon sets the button mappings on the device in the server. Then it has to swap the tapping actions from left/right/middle for 1/2/3-finger tap to right/left/middle. That way synaptics submits right button clicks for a one-finger tap, which is then swapped back by the server to a left click.

The X.org input drivers are almost impossible to test. synaptics has (quick guesstimate done with grep and wc) around 70 user-configurable options. Testing all combinations would be something around the order of 10101 combinations, not accounting for HW differences. Testing the driver on it's own is not doable, you need to fire up an X server and then run various tests against that (see XIT). But now you're not testing the driver, you're testing the whole stack. And you can only get to the driver through the X protocol, and that is 2 APIs away from the driver core. Plus, test results get hard to evaluate as different modules update separately.

So in summary, in the current stack features are distributed across modules that don't communicate with each other. The stack is impossible to test, partially thanks to the vast array of user-exposed options. These are largely technical issues, we control the xf86 DDX API and can break it when needed to, but at this point you're looking at something that resembles a rewrite anyway. And of course, don't you dare change my workflow!

The input stack in Wayland

From the input stack's POV, Wayland simply merges the X server and the input modules into one item. See the architecture diagram from the wayland docs:

evdev gets fed into the compositor and wayland comes out the other end. If life were so simple... Due to the X.org input modules being inseparable from the X server, Weston and other compositors started implementing their own input stack, separately. Let me introduce a game called feature bingo: guess which feature is currently not working in $COMPOSITOR. If you collect all five in a row, you get to shout "FFS!" and win the price of staying up all night fixing your touchpad. As much fun as that can be, maybe let's not do that.

libinput

libinput provides a full input stack to compositors. It does device discovery over udev and event processing and simply provides the compositor with the pre-processed events. If one of the devices is a touchpad, libinput will handle tapping, two-finger scrolling, etc. All the compositor needs to worry about is moving the visible cursor, selecting the client and converting the events into wayland protocol. The stack thus looks something like this:

Almost everything has moved into libinput, including device discovery and pointer acceleration. libinput has internal backends for pointers, touchpads, tablets, etc. but they are not exposed to the compositor. More importantly, libinput knows about all devices (within a seat), so cross-device communication is possible but invisible to the compositor. The compositor still does configuration parsing, but only for user-specific options such as whether to enable tapping or not. And it doesn't handle the actual feature, it simply tells libinput to enable or disable it.

The graph above also shows another important thing: libinput provides an API to the compositor. libinput is not "wayland-y", it doesn't care about the Wayland protocol, it's simply an input stack. Which means it can be used as base for an X.org input driver or even Canonical's MIR.

libinput is very much a black box, at least compared to X input drivers (remember those 70 options in synaptics?). The X mantra of "mechanism, not policy" allows for interesting use-cases, but it makes the default 90% use-case extremely painful from a maintainer's and integrator's point of view. libinput, much like wayland itself, is a lot more restrictive in what it allows, specifically in the requirement it places on the compositor. At the same time aims for a better out-of-the-box experience.

To give you an example, the X.org synaptics driver lets you arrange the software buttons more-or-less freely on the touchpad. The default placement is simply a config snippet. In libinput, the software buttons are always at the bottom of the touchpad and also at the top of the touchpad on some models (Lenovo *40 series, mainly). The buttons are of a fixed size (which we decided on after analysing usage data), and you only get a left and right button. The top software buttons have left/middle/right matching the markings on the touchpad. The whole configuration is decided based on the hardware. The compositor/user don't have to enable them, they are simply there when needed.

That may sound restrictive, but we have a number of features on top that we can enable where required. Pressing both left and right software buttons simultaneously gives you a middle button click; the middle button in the top software button row provides wheel emulation for the trackstick. When the touchpad is disabled, the top buttons continue to work and they even grow larger to make them easier to hit. The touchpad can be set to auto-disable whenever an external mouse is plugged in.

And the advantage of having libinput as a generic stack also results in us having tests. So we know what the interactions are between software buttons and tapping, we don't have to wait for a user to trip over a bug to tell us what's broken.

Summary

We need a new input stack for Wayland, simply because the design of compositors in a Wayland world is different. We can't use the current modules of X.org for a number of technical reasons, and the amount of work it would require to get those up to scratch and usable is equivalent to a rewrite.

libinput now provides that input stack. It's the default in Weston at the time of this writing and used in other compositors or in the process of being used. It abstracts most of input away and more importantly makes input consistent across all compositors.

Monday, September 22, 2014

Stylus behaviour on Microsoft Surface 3 tablets

Note: The purpose of this post is basically just so we have a link when this comes up in future bugreports.

Some stylus devices have two buttons on the stylus, plus the tip itself which acts as a button. In the kernel, these two are forwarded to userspace as BTN_STYLUS and BTN_STYLUS2. Userspace then usually maps those two into right and middle click, depending on your configuration. The pen itself used BTN_TOOL_PEN when it goes into proximity.

The default stylus that comes with the Wacom Intuos Pro [1] has an eraser on the other side of the pen. If you turn the pen around it goes out of proximity and comes back in as BTN_TOOL_RUBBER. [2] In the wacom X driver we handle this accordingly, through two different devices available via the X Input Extension. For example the GIMP assigns different tools assigned to each device. [3]

In the HID spec there are a couple of different fields (In Range, Tip Switch, Barrel Switch, Eraser and Invert) that matter here. Barrel Switch is the stylus button, In Range and Tip Switch are proximity and "touching the surface". Invert signals which side of the pen points down, and Eraser is triggered when the eraser touches the surface. In Wacom tablets, Invert is always on when the eraser touches because that's how the pens designed.

Microsoft, in its {in}finite wisdom has decided to make the lower button an "eraser" button on its Surface 3 Pen. So what happens now is that once you press the button, In Range goes to zero, then to one in the next event, together with Invert. Eraser comes on once you touch the surface but curiously that also causes Invert to go off. Anyway, that's a low-level detail that will get handled. What matters to users is that on the press of that button, the pen goes virtually out of proximity, comes back in as eraser and then hooray, you can now use it as an eraser tool without having actually moved it. Of course, since the button controls the mode it doesn't actually work as button, you're left with the second button on the stylus only.

Now, the important thing here is: that's the behaviour you get if you have one of these devices. We could work around this in software by detecting the mode button, flipping bits here and there and trying to emulate a stylus button based on the mode switches. But we won't. The overlords have decreed and it's too much effort to hack around the intended behaviour for little gain.

[1] If marketing decides to rename products so that need a statement "Bamboo pen tablets are now Intuos. Intuos5 is now Intuos Pro." then you've probably screwed up.
[2] Isn't it nice to see some proper queen's English for a change? For those of you on the other side of some ocean: eraser.
[3] GIMP, rubber tool, I'm not making this up, seriously

Friday, September 19, 2014

pointer acceleration in libinput - a userstudy

This post is a summary, the full writeup with data is here (PDF). The texts are quite similar, so if you plan to read the paper you can skip this post.

Following pointer acceleration in libinput - an analysis, we decided to run an actual userstudy to gather some data on how our acceleration behaves, and - more importantly - test if a modified acceleration method is better.

We developed two new pointer acceleration methods (plus the one already in libinput). As explained previously, the pointer acceleration method is a function mapping input speed of a device into cursor speed in pixels. The faster one moves the mouse, the further the cursor moves per "mickey" (a 1-device unit movement). In a simplest example, input deltas of 1 may result in a 1 pixel movement, input deltas of 10 may result in a 30 pixel movement.

The three pointer acceleration methods used in this study were nicknamed:

smooth:
A shortening of "smooth and simple", this method is used in libinput 0.5 as well as in the X.Org stack since ~2008.
stretched:
a modification of 'smooth' with roughly the same profile, but the maximum acceleration is applied at a higher speed. This method was developed by Hans de Goede and very promising in personal testing.
linear:
a linear acceleration method with a roughly similar speed-to-acceleration profile as the first two. This method was developed to test if a simple function could achieve similar results, as the more complex "smooth" and "stretched" methods.
The input data expected by all three methods is in units/ms. Touchpad devices are normalised to 400 dpi, other devices are left as-is. It is impossible to detect in software what resolution a generic mouse supports, so any acceleration method differs between devices. This is intended by the manufacturer, high-resolution devices are sold as "faster" for this reason.

The three pointer acceleration methods
As the graph shows, the base profile is roughly identical and the main difference is how quickly the maximum acceleration factor is reached.

Study description

Central component was a tool built on libinput that displays a full-screen white window, with a round green target. Participants were prompted by GTK dialog boxes on the steps to take next. Otherwise the study was unsupervised and self-guided.

The task required participants to click on a round target with a radius of 15, 30 and 45 pixels. Targets were grouped, each "set" consisted of 15 targets of the same size. On a successful click within the target, a new target appeared on one out of 12 possible locations, arranged in a grid of 4x3 with grid points 300 pixels apart. The location of the target was randomly selected but was never on the same location twice in a row.


Screenshot of the study tool with the first target (size 45) visible.

Each participant was tested for two acceleration methods, each acceleration method had 6 sets of 15 targets (2 sets per target size, order randomised). The two acceleration methods were randomly selected on startup, throughout the study they were simply referred to as "first" and "second" acceleration method with no further detail provided. Acceleration changed after 6 sets (participants were informed about it), and on completion of all 12 sets participants had to fill out a questionnaire and upload the data.

Statistical concepts

A short foray into statistics to help explain the numbers below. This isn't a full statistics course, I'm just aiming to explain the various definitions used below.

The mean of a dataset is what many people call the average: all values added up divided by the number of values. As a statistical tool, the mean is easy to calculate but is greatly affected by outliers. For skewed datasets the median is be more helpful: the middle value of the data array (array[len/2]). The closer the mean and the median are together, the more symmetrical the distribution is.

The standard deviation (SD) describes how far the data points spread from the median. The smaller the SD, the closer together are the data points. The SD is also used to estimate causality vs randomly induced sampling errors. Generally, if the difference between two items is more than 2 standard deviations, there's a 95% confidence that this is a true effect, not just randomness (95% certainty is a widely accepted standard in this domain). That 95% directly maps to the p-value you may have seen in other studies. A p-value of less than 0.05 equals a less than 5% chance of random factors causing the data differences. That translates into "statistically significant".

The ANOVA method is a standard statistical tool for studies like ours. (we're using one-way ANOVA only here, Wikipedia has an example here). If multiple sets of samples differ in only a single factor (e.g. pointer acceleration method), we start with the so-called Null-Hypothesis of "the factor has no influence, all results are the same on average". Our goal is to reject that hypothesis so we can say that the factor did actually change things. If we cannot reject the Null-Hypothesis, either our factor didn't change anything or the results are caused by random influences. The tools for ANOVA compare the mean value within each sets to the mean value differences across the sets and spit out a p-value. As above, a p-value less than 0.05 means greater than 95% confidence that the Null-Hypothesis can be rejected, i.e. we can say our factor did cause those differences.

One peculiarity of ANOVA is that the sample sets have to be the same size. This affects our samples, more see below.

Study participants

An email was sent to three Red Hat-internal lists with a link to the study description. One list was a specific developer list, the other two list were generic lists. As Red Hat employees, participants are expected to be familiar with Linux-based operating systems and the majority is more technical than the average user. The data collected does not make it possible to identify who took part in the study beyond the information provided in the questionnaire.

44 participants submitted results, 7 left-handed, 37 right-handed (no ambidextrous option was provded in the questionnaire). Gender distribution was 38 male, 6 female. Mean age was 33.3 years (SD 6.7) and participants had an mean 21.2 years of experience with mouse-like input devices (SD 4.9) and used those devices an average 58.1 hours per week (SD 20.0).

As all participants are familiar with Linux systems and thus exposed to the smooth acceleration method on their workstations, we expect a bias towards the smooth acceleration method.

Study data

Data was manually checked and verified, three result files were discarded for bugs or as extreme outliers, leaving us with 41 data files. The distribution of methods in these sets was: 27 for smooth, 25 for stretched and 30 for linear.

The base measurement was the so-called "Index of Difficulty" (ID), the number obtained by distance-to-target/width-of-target. This index gives an indication on how difficult it is to hit the target; a large target very close is easier to hit than a small target that is some distance away.


Illustration of the Index of Difficulty for a target.

In hindsight, the study was not ideally suited for evaluation based on ID. The targets were aligned on a grid and the ID based on the pointer position was very variable. As is visible in the graph below, there are few clear dividing lines to categorise the targets based on their ID. For the evaluation the targets were grouped into specific ID groups: ID < 4.2, ID < 8.4, ID < 12.9, ID < 16.9 < ID < 25 and ID > 25. The numbers were selected simply because there are clear gaps between the ID clusters. This division results in uneven group sizes, (I ran the same calculations with different group numbers, it does not have any real impact on the results.)


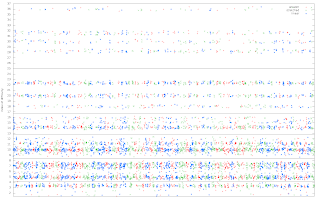
ID for each target with the divider lines shown
The top ID was 36.44, corresponding to a 15px radius target 1093 pixels away, the lowest ID was 1.45, corresponding to a 45px radius target 130 pixels away.

Number of targets per ID group
As said above, ANOVA requires equal-sized sample sets. ANOVA was performed separately between the methods (i.e. smooth vs stretched, then smooth vs linear, then stretched vs linear). Before each analysis, the two data arrays were cut to be of equal length. For example, comparing smooth and stretched in the ID max group shortened the smooth dataset to 150 elements. The order of targets was randomised.

Study Results

The following factors were analysed:

  • Time to click on target
  • Movement efficiency
  • Overshoot

Time to click on target

Time to click on a target was measured as the time between displaying the target and clicking on it. This does not take reaction time into account, but there is no reliable way of measuring reaction time in this setup.


Mean time to click on target

As is visible, an increasing ID increases the time-to-click. On a quick glance, we can see that the smooth method is slower than the other two in most ID groups, with linear and stretched being fairly close together. However, the differences are only statistically significant in the following cases:

  • ID 8.4: linear is faster than smooth and stretched
  • ID 12.9: linear and stretched are faster than smooth
  • ID 25: linear and stretched are faster than smooth
In all other combinations, there is no statistically significant difference between the three methods, but overall a slight advantage for the two methods stretched and linear.

Efficiency of movement

The most efficient path from the cursor position to the target is a straight line. However, most movements do not follow that straight line for a number of reasons. One of these reasons is basic anatomy - it is really hard to move a mouse in a straight line due to the rotary action of our wrists. Other reasons may be deficiencies in the pointer acceleration method. To measure the efficiency, we calculated the distance to the target (i.e. the straight line) and compared that to all the deltas added up to the total movement. Note that the distance is to the center of the target, whereas the actual movement may be to any point in the target. So for short distances and large targets, there is a chance that a movement may be less than the distance to the target.


Straight distance to target vs. movement path shows the efficiency of movement.

The efficiency was calculated as movement-path/distance, then normalised to a percent value. A value of 10 thus means the movement path was 10% longer than the straight line to the target centre).


Extra distance covered
Stretched seems to perform better than smooth and linear in all but one ID group and smooth performing worse than linear in all but ID group 4.2. Looking at the actual values however shows that the large standard deviation prevents statistical significance. The differences are only statistically significant in the following cases:
  • ID 4.2: stretched is more efficient than smooth and linear
In all other combinations, there is no statistically significant difference between the three methods.

Overshoot

Somewhat similar to the efficiency of movement, the overshoot is the distance the pointer has moved past the target. It was calculated by drawing a line perpendicular to the direct path from the pointer position to the target's far side. If the pointer moves past this line, the user has overshot the target. The maximum distance between the line and the pointer shows how much the user has overshot the target.


Illustration of pointer overshooting the target.
The red line shows the amount the pointer has overshot the target.
Overshoot was calculated in pixels, as % of the distance and as % of the actual path taken. Unsurprisingly, the graphs look rather the same so I'll only put one up here.

Overshoot in pixels by ID group
As the ID increases, the amount of overshooting increases too. Again the three pointer acceleration methods are largely the same, though linear seems to be slightly less affected by overshoot than smooth and stretched. The differences are only statistically significant in the following cases:
  • ID 4.2: if measured as percentage of distance, stretched has less overshoot than linear.
  • ID 8.4: if measured as percentage of movement path, linear has less overshoot than smooth.
  • ID 16.8: if measured as percentage of distance, stretched and linear have less overshoot than smooth.
  • ID 16.8: if measured as percentage of distance, linear has less overshoot than smooth.
  • ID 16.8: if measured in pixels, linear has less overshoot than smooth.
In all other combinations, there is no statistically significant difference between the three methods.

Summary

In summary, there is not a lot of difference between the three methods, though smooth has no significant advantage in any of the measurements. The race between stretched and linear is mostly undecided.

Questionnaire results

The above data was objectively measured. Equally important is the subjective feel of each acceleration method. At the end of the study, the following 14 questions were asked of each participant, with answer ranges in a 5-point Likert scale, ranging from "Strongly Disagree" to "Strongly Agree".

  1. The first acceleration method felt natural
  2. The first acceleration method allowed for precise pointer control
  3. The first acceleration method allowed for fast pointer movement
  4. The first acceleration method made it easy to hit the targets
  5. I would prefer the first acceleration method to be faster
  6. I would prefer the first acceleration method to be slower
  7. The second acceleration method felt natural
  8. The second acceleration method allowed for precise pointer control
  9. The second acceleration method allowed for fast pointer movement
  10. The second acceleration method made it easy to hit the targets
  11. I would prefer the second acceleration method to be faster
  12. I would prefer the second acceleration method to be slower
  13. The two acceleration methods felt different
  14. The first acceleration method was preferable over the second
The figure below shows that comparatively few "strongly agree" and "strongly disagree" answers were given, hinting that the differences between the methods were small.

Distribution of answers in the questionnaire
Looking at statistical significance, the questionnaire didn't really provide anything of value. Not even the question "The two acceleration methods felt different" provided any answers, and the question "The first acceleration method was preferable over the second" was likewise inconclusive. So the summary of the questionnaire is pretty much: on the whole none of the methods stood out as better or worse.

Likert frequencies for the question of which method is preferable

Summary

Subjective data was inconclusive, but the objective data goes slightly in favour of linear and stretched over the current smooth method. We didn't have enough sample sets to analyse separately for each device type, so from a maintainer's point of view the vote goes to linear. It allows replacing a rather complicated pointer acceleration method with 3 lines of code.

Thursday, July 10, 2014

pointer acceleration in libinput - an analysis

Following Christian's Wayland in Fedora Update post, and after Hans fixed the touchpad acceleration, I've been playing with pointer acceleration in libinput a bit. The main focus was not yet on changing it but rather on figuring out what we actually do and where the room for improvement is. There's a tool in my (rather messy) github wip/ptraccel-work branch to re-generate the graphs below.

This was triggered by a simple plan: I want a configuration interface in libinput that provides a sliding scale from -1 to 1 to adjust a device's virtual speed from slowest to fastest, with 0 being the default for that device. A user should not have to worry about the accel mechanism itself, which may be different for any given device, all they need to know is that the setting -0.5 means "halfway between default and 'holy cow this moves like molasses!'". The utopia is of course that for any given acceleration setting, every device feels equally fast (or slow). In order to do that, I needed the right knobs to tweak.

The code we currently have in libinput is pretty much 1:1 what's used in the X server. The X server sports a lot more configuration options, but what we have in libinput 0.4.0 is essentially what the default acceleration settings are in X. Armed with the knowledge that any #define is a potential knob for configuration I went to investigate. There are two defines that are labelled as adjustible parameters:

  • DEFAULT_THRESHOLD, set to 0.4
  • DEFAULT_ACCELERATION, set to 2.0
But what do they mean, exactly? And what exactly does a value of 0.4 represent?
[side-note: threshold was 4 until I took the constant multiplier out, it's now 0.4 upstream and all the graphs represent that.]

Pointer acceleration is nothing more than mapping some input data to some potentially faster output data. How much faster depends on how fast the device moves, and to get there one usually needs a couple of steps. The trick of course is to make it predictable, so that despite the acceleration, your brain thinks that the visible cursor is an extension of your hand at all speeds.

Let's look at a high-level outline of our pointer acceleration code:

  • calculate the velocity of the current movement
  • use that velocity to calculate the acceleration factor
  • apply accel to dx/dy
  • smoothen out the dx/dy to avoid abrupt changes between two events

Calculating pointer speed

We don't just use dx/dy as values, rather, we use the pointer velocity. There's a simple reason for that: dx/dy depends on the device's poll rate (or interrupt frequency). A device that polls twice as often sends half the dx/dy values in each event for the same physical speed.

Calculating the velocity is easy: divide dx/dy by the delta time. We use a set of "trackers" that store previous dx/dy values with their timestamp. As long as we get movement in the same cardinal direction, we take those into account. So if we have 5 events in direction NE, the speed is averaged over those 5 events, smoothing out abrupt speed changes.

The acceleration function

The speed we just calculated is passed to the acceleration function to calculate an acceleration factor.

Figure 1: Mapping of velocity in unit/ms to acceleration factor (unitless). X axes here are labelled in units/ms and mm/s.
This function is the only place where DEFAULT_THRESHOLD/DEFAULT_ACCELERATION are used, but they mostly just stretch the graph. The shape stays the same.

The output of this function is a unit-less acceleration factor that is applied to dx/dy. A factor of 1 means leaving dx/dy untouched, 0.5 is half-speed, 2 is double-speed.

Let's look at the graph for the accel factor output (red): for very slow speeds we have an acceleration factor < 1.0, i.e. we're slowing things down. There is a distinct plateau up to the threshold of 0.4, after that it shoots up to roughly a factor of 1.6 where it flattens out a bit until we hit the max acceleration factor

Now we can also put units to the two defaults: Threshold is clearly in units/ms, and the acceleration factor is simply a maximum. Whether those are mentally easy to map is a different question.

We don't use the output of the function as-is, rather we smooth it out using the Simpson's rule. The second (green) curve shows the accel factor after the smoothing took effect. This is a contrived example, the tool to generate this data simply increased the velocity, hence this particular line. For more random data, see Figure 2.

Figure 2: Mapping of velocity in unit/ms to acceleration factor (unitless) for a random data set. X axes here are labelled in units/ms and mm/s.
For the data set, I recorded the velocity from libinput while using Firefox a bit.

The smoothing takes history into account, so the data points we get depend on the usage. In this data set (and others I tested) we see that the majority of the points still lie on or close to the pure function, apparently the delta doesn't matter that much. Nonetheless, there are a few points that suggest that the smoothing does take effect in some cases.

It's important to note that this is already the second smoothing to take effect - remember that the velocity (may) average over multiple events and thus smoothens the input data. However, the two smoothing effects somewhat complement each other: velocity smoothing only happens when the pointer moves consistently without much change, the Simpson's smoothing effect is most pronounced when the pointer moves erratically.

Ok, now we have the basic function, let's look at the effect.

Pointer speed mappings

Figure 3: Mapping raw unaccelerated dx to accelerated dx, in mm/s assuming a constant pysical device resolution of 400 dpi that sends events at 125Hz. dx range mapped is 0..127
The graph was produced by sending 30 events with the same constant speed, then dividing by the number of events to reduce any effects tracker feeding has at the initial couple of events.

The two lines show the actual output speed in mm/s and the gain in mm/s, i.e. (output speed - input speed). We can see that the little nook where the threshold kicks in and after the acceleration is linear. Look at Figure 1 again: the linear acceleration is caused by the acceleration factor maxing out quickly.

Most of this graph is theoretical only though. On your average mouse you don't usually get a delta greater than 10 or 15 and this graph covers the theoretical range to 127. So you'd only ever be seeing the effect of up to ~120 mm/s. So a more realistic view of the graph is:

Figure 4: Mapping raw unaccelerated dx to accelerated dx, see Figure 3 for details. Zoomed in to a max of 120 mm/s (15 dx/event).
Same data as Figure 3, but zoomed to the realistic range. We go from a linear speed increase (no acceleration) to a quick bump once the threshold is hit and from then on to a linear speed increase once the maximum acceleration is hit.

And to verify, the ratio of output speed : input speed:

Figure 5: Mapping of the unit-less gain of raw unaccelerated dx to accelerated dx, i.e. the ratio of accelerated:unaccelerated.

Looks pretty much exactly like the pure acceleration function, which is to be expected. What's important here though is that this is the effective speed, not some mathematical abstraction. And it shows one limitation: we go from 0 to full acceleration within really small window.

Again, this is the full theoretical range, the more realistic range is:

Figure 6: Mapping of the unit-less gain of raw unaccelerated dx to accelerated dx, i.e. the ratio of accelerated:unaccelerated. Zoomed in to a max of 120 mm/s (15 dx/event).
Same data as Figure 5, just zoomed in to a maximum of 120 mm/s. If we assume that 15 dx/event is roughly the maximum you can reach with a mouse you'll see that we've reached maximum acceleration at a third of the maximum speed and the window where we have adaptive acceleration is tiny.

Tweaking threshold/accel doesn't do that much. Below are the two graphs representing the default (threshold=0.4, accel=2), a doubled threshold (threshold=0.8, accel=2) and a doubled acceleration (threshold=0.4, accel=4).

Figure 6: Mapping raw unaccelerated dx to accelerated dx, see Figure 3 for details. Zoomed in to a max of 120 mm/s (15 dx/event). Graphs represent thresholds:accel settings of 0.4:2, 0.8:2, 0.4:4.
Figure 7: Mapping of the unit-less gain of raw unaccelerated dx to accelerated dx, see Figure 5 for details. Zoomed in to a max of 120 t0.4 a4 (15 dx/event). Graphs represent thresholds:accel settings of 0.4:2, 0.8:2, 0.4:4.
Doubling either setting just moves the adaptive window around, it doesn't change that much in the grand scheme of things.

Now, of course these were all fairly simple examples with constant speed, etc. Let's look at a diagram of what is essentially random movement, me clicking around in Firefox for a bit:

Figure 8: Mapping raw unaccelerated dx to accelerated dx on a fixed random data set.
And the zoomed-in version of this:
Figure 9: Mapping raw unaccelerated dx to accelerated dx on a fixed random data set, zoomed in to events 450-550 of that set.
This is more-or-less random movement reflecting some real-world usage. What I find interesting is that it's very hard to see any areas where smoothing takes visible effect. the accelerated curve largely looks like a stretched input curve. tbh I'm not sure what I should've expected here and how to read that, pointer acceleration data in real-world usage is notoriously hard to visualize.

Summary

So in summary: I think there is room for improvement. We have no acceleration up to the threshold, then we accelerate within too small a window. Acceleration stops adjusting to the speed soon. This makes us lose precision and small speed changes are punished quickly.

Increasing the threshold or the acceleration factor doesn't do that much. Any increase in acceleration makes the mouse faster but the adaptive window stays small. Any increase in threshold makes the acceleration kick in later, but the adaptive window stays small.

We've already merged a number of fixes into libinput, but some more work is needed. I think that to get a good pointer acceleration we need to get a larger adaptive window [Citation needed]. We're currently working on that (and figuring out how to evaluate whatever changes we come up with).

A word on units

The biggest issue I was struggling with when trying to understand the code was that of units. The code didn't document used units anywhere but it turns out that everything was either in device units ("mickeys"), device units/ms or (in the case of the acceleration factors) was unitless.

Device units are unfortunately a pretty useless base entity, only slightly more precise than using the length of a piece of string. A device unit depends on the device resolution and of course that differs between devices. An average USB mouse tends to have 400 dpi (15.75 units/mm) but it's common to have 800 dpi, 1000 dpi and gaming mice go up to 8200dpi. A touchpad can have resolutions of 1092 dpi (43 u/mm), 3277 dpi (129 u/mm), etc. and may even have different resolutions for x and y.

This explains why until commit e874d09b4 the touchpad felt slower than a "normal" mouse. We scaled to a magic constant of 10 units/mm, before hitting the pointer acceleration code. Now, as said above the mouse would likely have a resolution of 15.75 units/mm, making it roughly 50% faster. The acceleration would kick in earlier on the mouse, giving the touchpad and the mouse not only different speeds but a different feel altogether.

Unfortunately, there is not much we can do about mice feeling different depending on the resolution. To my knowledge there is no way to query the resolution on a device. But for absolute devices that need pointer acceleration (i.e. touchpads) we can normalize to a fake resolution of 400 dpi and base the acceleration code on that. This provides the same feel on the mouse and the touchpad, as much as that is possible anyway.

Wednesday, May 21, 2014

configure fails with "No package 'foo' found" - and how to fix it

A common error when building from source is something like the error below:

configure: error: Package requirements (foo) were not met:

No package 'foo' found

Consider adjusting the PKG_CONFIG_PATH environment variable if you
installed software in a non-standard prefix.
Seeing that can be quite discouraging, but luckily, in many cases it's not too difficult to fix. As usual, there are many ways to get to a successful result, I'll describe what I consider the simplest.

What does it mean?

pkg-config is a tool that provides compiler flags, library dependencies and a couple of other things to correctly link to external libraries. For more details on it see Dan Nicholson's guide. If a build system requires a package foo, pkg-config searches for a file foo.pc in the following directories: /usr/lib/pkgconfig, /usr/lib64/pkgconfig, /usr/share/pkgconfig, /usr/local/lib/pkgconfig, /usr/local/share/pkgconfig. The error message simply means pkg-config couldn't find the file and you need to install the matching package from your distribution or from source.

What package provides the foo.pc file?

In many cases the package is the development version of the package name. Try foo-devel (Fedora, RHEL, SuSE, ...) or foo-dev (Debian, Ubuntu, ...). yum provides a great shortcut to install any pkg-config dependency:

$> yum install "pkgconfig(foo)"
will automatically search and install the right package, including its dependencies.
apt-get requires a bit more effort:
$> apt-get install apt-file
$> apt-file update
$> apt-file search --package-only foo.pc
foo-dev
$> apt-get install foo-dev
For those running Arch and pacman, the sequence is:
$> pacman -S pkgfile
$> pkgfile -u
$> pkgfile foo.pc
extra/foo
$> pacman -S extra/foo
zypper is the same as yum:
$> zypper in 'pkgconfig(foo)'
Once that's done you can re-run configure and see if all dependencies have been met. If more packages are missing, follow the same process for the next file.

Any users of other distributions - let me know how to do this on yours and I'll update the post

Where does the dependency come from?

In most projects using autotools the dependency is specified in the file configure.ac and looks roughly like one of these:

PKG_CHECK_MODULES(FOO, [foo])
PKG_CHECK_MODULES(DEPENDENCIES, foo [bar >= 1.4] banana)
The first argument is simple a name that is used in the build system, you can ingore it. After the comma is the list of space-separated dependencies. In this case this means we need foo.pc, bar.pc and banana.pc, and more specifically we need a bar.pc that is equal or newer to version 1.4 of the package. To install all three follow the above steps and you're good.

My version is wrong!

It's not uncommon to see the following error after installing the right package:

configure: error: Package requirements (foo >= 1.9) were not met:

Requested 'foo >= 1.9' but version of foo is 1.8

Consider adjusting the PKG_CONFIG_PATH environment variable if you
installed software in a non-standard prefix.
Now you're stuck and you have a problem. What this means is that the package version your distribution provides is not new enough to build your software. This is where the simple solutions and and it all gets a bit more complicated - with more potential errors. Unless you are willing to go into the deep end, I recommend moving on and accepting that you can't have the newest bits on an older distribution. Because now you have to build the dependencies from source and that may then require to build their dependencies from source and before you know you've built 30 packages. If you're willing read on, otherwise - sorry, you won't be able to run your software today.

Manually installing dependencies

Now you're in the deep end, so be aware that you may see more complicated errors in the process. First of all you need to figure out where to get the source from. I'll now use cairo as example instead of foo so you see actual data. On rpm-based distributions like Fedora run:

$> yum info cairo-devel    
Loaded plugins: auto-update-debuginfo, langpacks
Skipping unreadable repository '///etc/yum.repos.d/SpiderOak-stable.repo'
Installed Packages
Name        : cairo-devel
Arch        : x86_64
Version     : 1.13.1
Release     : 0.1.git337ab1f.fc20
Size        : 2.4 M
Repo        : installed
From repo   : fedora
Summary     : Development files for cairo
URL         : http://cairographics.org
License     : LGPLv2 or MPLv1.1
Description : Cairo is a 2D graphics library designed to provide high-quality
            : display and print output.
            : 
            : This package contains libraries, header files and developer
            : documentation needed for developing software which uses the cairo
            : graphics library.
The important field here is the URL line - got to that and you'll find the source tarballs. That should be true for most projects but you may need to google for the package name and hope. Search for the tarball with the right version number and download it. On Debian and related distributions, cairo is provided by the libcairo2-dev package. Run apt-cache show on that package:
$> apt-cache show libcairo2-dev
Package: libcairo2-dev
Source: cairo
Version: 1.12.2-3
Installed-Size: 2766
Maintainer: Dave Beckett 
Architecture: amd64
Provides: libcairo-dev
Depends: libcairo2 (= 1.12.2-3), libcairo-gobject2 (= 1.12.2-3),[...]
Suggests: libcairo2-doc
Description-en: Development files for the Cairo 2D graphics library
 Cairo is a multi-platform library providing anti-aliased
 vector-based rendering for multiple target backends.
 .
 This package contains the development libraries, header files needed by
 programs that want to compile with Cairo.
Homepage: http://cairographics.org/
Description-md5: 07fe86d11452aa2efc887db335b46f58
Tag: devel::library, role::devel-lib, uitoolkit::gtk
Section: libdevel
Priority: optional
Filename: pool/main/c/cairo/libcairo2-dev_1.12.2-3_amd64.deb
Size: 1160286
MD5sum: e29852ae8e8e5510b00b13dbc201ce66
SHA1: 2ed3534d02c01b8d10b13748c3a02820d10962cf
SHA256: a6099cfbcc6bd891e347dd9abc57b7f137e0fd619deaff39606fd58f0cc60d27
In this case it's the Homepage line that matters, but the process of downloading tarballs is the same as above. For Arch users, the interesting line is URL as well:
$> pacman -Si cairo | grep URL
Repository      : extra
Name            : cairo
Version         : 1.12.16-1
Description     : Cairo vector graphics library
Architecture    : x86_64
URL             : http://cairographics.org/
Licenses        : LGPL MPL
....
zypper (Tizen, SailfishOS, Meego and others) doesn't have an interface for this, but you can run rpm on the package that you installed.
$> rpm -qi cairo-devel
Name        : cairo-devel
[...]
URL         : http://cairographics.org/
This command would obviously work on other rpm-based distributions too (Fedora, RHEL, ...). Unlike yum, it does require the package to be installed but by the time you get here you've already installed it anyway :)

Now to the complicated bit: In most cases, you shouldn't install the new version over the system version because you may break other things. You're better off installing the dependency into a custom folder ("prefix") and point pkg-config to it. So let's say you downloaded the cairo tarball, now you need to run:

$> mkdir $HOME/dependencies/
$> tar xf cairo-someversion.tar.xz
$> cd cairo-someversion
$> autoreconf -ivf
$> ./configure --prefix=$HOME/dependencies
$> make && make install
$> export PKG_CONFIG_PATH=$HOME/dependencies/lib/pkgconfig:$HOME/dependencies/share/pkgconfig
# now go back to original project and run configure again
So you create a directory called dependencies, install cairo there. This will install cairo.pc as $HOME/dependencies/lib/cairo.pc. Now all you need to do is tell pkg-config that you want it to look there as well - so you set PKG_CONFIG_PATH. If you re-run configure in the original project, pkg-config will find the new version and configure should succeed. If you have multiple packages that all require a newer version, install them into the same path and you only need to set PKG_CONFIG_PATH once. Remember you need to set PKG_CONFIG_PATH in the same shell as you are running configure from.

If you keep seeing the version error the most common problem is that PKG_CONFIG_PATH isn't set in your shell, or doesn't point to the new cairo.pc file. A simple way to check is:

$> pkg-config --modversion cairo
1.13.1
Is the version number the one you installed or the system one? If it is the system one, you have a typo in PKG_CONFIG_PATH, just re-set it. If it still doesn't work do this:
$> cat $HOME/dependencies/lib/pkgconfig/cairo.pc
prefix=/usr
exec_prefix=/usr
libdir=/usr/lib64
includedir=/usr/include

Name: cairo
Description: Multi-platform 2D graphics library
Version: 1.13.1

Requires.private:   gobject-2.0 glib-2.0 >= 2.14 [...]
Libs: -L${libdir} -lcairo
Libs.private:            -lz -lz    -lGL        
Cflags: -I${includedir}/cairo
If the Version field matches what pkg-config returns, then you're set. If not, keep adjusting PKG_CONFIG_PATH until it works. There is a rare case where the Version field in the installed library doesn't match what the tarball said. That's a defective tarball and you should report this to the project, but don't worry, this hardly ever happens. In almost all cases, the cause is simply PKG_CONFIG_PATH not being set correctly. Keep trying :)

Let's assume you've managed to build the dependencies and want to run the newly built project. The only problem is: because you built against a newer library than the one on your system, you need to point it to use the new libraries.

$> export LD_LIBRARY_PATH=$HOME/dependencies/lib
and now you can, in the same shell, run your project.

Good luck!

Monday, May 19, 2014

Introducing tellme, a text-to-speech notifier

I've been hacking on a little tool the last couple of days and I think it's ready for others to look at it and provide suggestions to improve it. Or possibly even tell me that it already exists, in which case I'll save a lot of time. "tellme" is a simple tool that uses text-to-speech to let me know when a command finished. This is useful for commands that run for a couple of minutes - you can go off read something and the computer tells you when it's done instead of you polling every couple of seconds to check. A simple example:

tellme sudo yum update
runs yum update, and eventually says in a beautiful totally-not-computer-sounding voice "finished yum update successfully".

That was the first incarnation which was a shell script, I've started putting a few more features in (now in Python) and it now supports per-command configuration and a couple of other semi-smart things. For example:

whot@yabbi:~/xorg/xserver/Xi> tellme make
eventually says "finished xserver make successfully". With the default make configuration, it runs up the tree to search for a .git directory and then uses that as basename for the voice output. Which is useful when you rebuild all drivers simultaneously and the box tells you which ones finished and whether there was an error.

I put it up on github: https://github.com/whot/tellme. It's still quite rough, but workable. Have a play with it and feel free to send me suggestions.

Wednesday, April 30, 2014

T440 touchpads, the story continues

I've just updated the post about X.Org synaptics support for the Lenovo T440, T540, X240, Helix, Yoga, X1 Carbon. For those following my blog, here is a rough diff of the updates:

  • All touchpads in this series need a kernel quirk to fix the min/max ranges. It's like a happy meal toy, make sure you collect them all.
  • A new kernel evdev input prop INPUT_PROP_TOPBUTTONPAD is available in 3.15. It marks the devices that require top software buttons. It will be backported to stable.
  • A new option was added HasSecondarySoftButtons was added to the synaptics driver. It is automatically set if INPUT_PROP_TOPBUTTONPAD is set and if set, the driver parses the SecondarySoftButtonAreas option and honours the values in it.
  • If you have the kernel min/max fixes and the new property, don't bother with DMI matching. Provide a xorg.conf.d snippet that unconditionally merges the SecondarySoftButtonAreas and rely on the driver for parsing it when appropriate

Thursday, March 27, 2014

Viewing the Xorg.log with journalctl

Those running Fedora Rawhide or GNOME 3.12 may have noticed that there is no Xorg.log file anymore. This is intentional, gdm now starts the X server so that it writes the log to the systemd journal. Update 29 Mar 2014: The X server itself has no capabilities for logging to the journal yet, but no changes to the X server were needed anyway. gdm merely starts the server with a /dev/null logfile and redirects stdin/stderr to the journal.

Thus, to get the log file use journalctl, not vim, cat, less, notepad or whatever your $PAGER was before.

This leaves us with the following commands.

journalctl -e _COMM=Xorg 
Which would conveniently show something like this:
Mar 25 10:48:41 yabbi Xorg[5438]: (II) UnloadModule: "wacom"
Mar 25 10:48:41 yabbi Xorg[5438]: (II) evdev: Lenovo Optical USB Mouse: Close
Mar 25 10:48:41 yabbi Xorg[5438]: (II) UnloadModule: "evdev"
Mar 25 10:48:41 yabbi Xorg[5438]: (II) evdev: Integrated Camera: Close
Mar 25 10:48:41 yabbi Xorg[5438]: (II) UnloadModule: "evdev"
Mar 25 10:48:41 yabbi Xorg[5438]: (II) evdev: Sleep Button: Close
Mar 25 10:48:41 yabbi Xorg[5438]: (II) UnloadModule: "evdev"
Mar 25 10:48:41 yabbi Xorg[5438]: (II) evdev: Video Bus: Close
Mar 25 10:48:41 yabbi Xorg[5438]: (II) UnloadModule: "evdev"
Mar 25 10:48:41 yabbi Xorg[5438]: (II) evdev: Power Button: Close
Mar 25 10:48:41 yabbi Xorg[5438]: (II) UnloadModule: "evdev"
Mar 25 10:48:41 yabbi Xorg[5438]: (EE) Server terminated successfully (0). Closing log file.
The -e toggle jumps to the end and only shows 1000 lines, but that's usually enough. journalctl has a bunch more options described in the journalctl man page. Note the PID in square brackets though. You can easily limit the output to just that PID, which makes it ideal to attach to the log to a bug report.
journalctl _COMM=Xorg _PID=5438
Previously the server kept only a single backup log file around, so if you restarted twice after a crash, the log was gone. With the journal it's now easy to extract the log file from that crash five restarts ago. It's almost like the future is already here.

Update 16/12/2014: This post initially suggested to use journactl /usr/bin/Xorg. Using _COMM is path-independent.

Fedora 21

Added 16/12/2014: If you recently updated to/installed Fedora 21 you'll notice that the above command won't show anything. As part of the Xorg without root rights feature Fedora ships a wrapper script as /usr/bin/Xorg. This script eventually executes /usr/libexecs/Xorg.bin which is the actual X server binary. Thus, on Fedora 21 replace Xorg with Xorg.bin:

journalctl -e _COMM=Xorg.bin
journalctl _COMM=Xorg.bin _PID=5438
Note that we're looking into this so that in a few updates time we don't have a special command here.

Tuesday, March 25, 2014

CyPS/2 Cypress Trackpad and firmware-based button emulation

For a longer story of this issue, please read Adam Williamson's post. The below is the gist of it, mostly for archival purposes.

The Dell XPS13 (not the current Haswell generation, the ones before) ships with a touchpad that identifies as "CyPS/2 Cypress Trackpad". This touchpad is, by the looks of it, a ClickPad and identifies itself as such by announcing the INPUT_PROP_BUTTONPAD evdev property. In the X.Org synaptics driver we enable a couple of features for those touchpads, the most visible of which is the software-emulated button areas. If you have your finger on the bottom left and click, it's a left click, on the bottom right it's a right click. The size and location of these areas are configurable in the driver but also trigger a couple of other behaviours, such as extra filters to avoid erroneous pointer movements.

The Cypress touchpad is different: it does the button emulation in firmware. A normal clickpad will give you a finger position and a BTN_LEFT event on click. The Cypress touchpads will simply send a BTN_LEFT or BTN_RIGHT event depending where the finger is located, but no finger position. Only once you move beyond some threshold will the touchpad send a finger position. This caused a number of issues when using the touchpad.

Fixing this is relatively simple: we merely need to tell the Cypress that it isn't a clickpad and hope that doesn't cause it some existential crisis. The proper way to do this is this kernel patch here by Hans de Goede. Until that is in your kernel, you can override it with a xorg.conf snippet:

Section "InputClass"+Section "InputClass"
        Identifier "Disable clickpad for CyPS/2 Cypress Trackpad"
        MatchProduct "CyPS/2 Cypress Trackpad"
        MatchDriver "synaptics"
        Option "ClickPad" "off"
EndSection
This snippet is safe to ship as a distribution-wide quirk.

Friday, March 21, 2014

Stacking xorg.conf.d snippets

We've had xorg.conf.d snippets for quite a while now (released with X Server 1.8 in April 2010). Many people use them as a single configuration that's spread across multiple files, but they also can be merged and rely on each other. The order they are applied is the lexical sort order of the directory, so I recommend always prefixing them with a number. But even within a single snippet, you can rely on the stacking. Let me give you an example:

$ cat /usr/share/X11/xorg.conf.d/10-evdev.conf
Section "InputClass"
    Identifier "evdev touchpad catchall"
    MatchIsTouchpad "on"
    MatchDevicePath "/dev/input/event*"
    Driver "evdev"
EndSection
$ cat /usr/share/X11/xorg.conf.d/50-synaptics.conf
Section "InputClass"
    Identifier "touchpad catchall"
    MatchIsTouchpad "on"
    MatchDevicePath "/dev/input/event*"
    Driver "synaptics"
EndSection
The first one applies the evdev driver to anything that looks like a touchpad. The second one, sorted later, overwrites this setting with the synaptics driver. Now, the second file also has a couple of other options:
Section "InputClass"
    Identifier "Default clickpad buttons"
    MatchDriver "synaptics"
    Option "SoftButtonAreas" "50% 0 82% 0 0 0 0 0"
EndSection
This option says "if the device is assigned the synaptics driver, merge the SoftButtonAreas option". And we have another one, from ages ago (which isn't actually needed anymore):
Section "InputClass"
    Identifier "Disable clickpad buttons on Apple touchpads"
    MatchProduct "Apple Wireless Trackpad"
    MatchDriver "synaptics"
    Option "ClickPad" "on"
EndSection
This adds on top of the other two, provided your device has the name and is assigned the synaptics driver.

The takeaway of this is that when you have your own xorg.conf.d snippet, there is almost never a need for you to write more than a 5-line snippet merging exactly that one or two options you want. Let the system take care of the rest.

Wednesday, March 19, 2014

X.Org synaptics support for the Lenovo T440, T540, X240, Helix, Yoga, X1 Carbon

Updates: 30 April 2014, for the new INPUT_PROP_TOP_BUTTONPAD

This is a follow-up to my post from December Lenovo T440 touchpad button configuration. Except this time the support is real, or at least close to being finished. Since I am now seeing more and more hacks to get around all this I figured it's time for some info from the horse's mouth.

[update] I forgot to mention: synaptics 1.8 will have all these, the first snapshot is available here

Lenovo's newest series of laptops have a rather unusual touchpad. The trackstick does not have a set of physical buttons anymore. Instead, the top part of the touchpad serves as software-emulated buttons. In addition, the usual ClickPad-style software buttons are to be emulated on the bottom edge of the touchpad. An ASCII-art of that would look like this:

+----------------------------+
| LLLLLLLLLL MMMMM RRRRRRRRR |
|                            |
|                            |
|                            |
|                            |
|                            |
|                            |
| LLLLLLLL          RRRRRRRR |
+----------------------------+
Getting this to work required a fair bit of effort, patches to synaptics, the X server and the kernel and a fair bit of trial-and-error. Kudos for getting all this sorted goes to Hans the Goede, Benjamin Tissoires, Chandler Paul and Matthew Garrett. And in the process of fixing this we also fixed a bunch of other issues that have been plaguing clickpads for a while.

The first piece in the puzzle was to add a second software button area to the synaptics driver. Option "SecondarySoftButtonAreas" now allows a configuration in the same manner as the existing one (i.e. right and middle button). Any click in that software button area won't move the cursor, so the buttons will behave just like physical buttons. Option "HasSecondarySoftButtons" defines if that button area is to be used. Of course, we expect that button area to work out of the box, so we now ship configuration files that detect the touchpad and apply that automatically. Update 30 Apr: Originally we tried to get this done based on the PNPID or DMI matching but a better solution is the new INPUT_PROP_TOPBUTTONPAD evdev property bit. This is now applied to all these touchpads, and the synaptics driver uses this to enable the secondary software button area. This bit will be aviailable in kernel 3.15, with stable backports happening after that.

The second piece in the puzzle was to work around the touchpad firmware. The touchpads speak two protocols, RMI4 over SMBus and PS/2. Windows uses RMI4, Linux still uses PS/2. Apparently the firmware never got tested for PS/2 so the touchpad gives us bogus data for its axis ranges. A kernel fix for this is in the pipe. Update 30 Apr: every single touchpad of this generation needs a fix. They have been or are being merged.

Finally, the touchpad needed to be actually usable. So a bunch of patches that tweak the clickpad behaviours were merged in. If a finger is set down inside a software button area, finger movement does no longer affect the cursor. This stops the ever-so-slight but annoying movements when you execute a physical click on the touchpad. Also, there is a short timeout after a click to avoid cursor movement when the user just presses and releases the button. The timeout is short enough that if you do a click-and-hold for drag-and-drop, the cursor will move as expected. If a touch started outside a software button area, we can now use the whole touchpad for movement. And finally, a few fixes to avoid erroneous click events - we'd sometimes get the software button wrong if the event sequence is off.

Another change changed the behaviour of the touchpad when it is disabled through the "Synaptics Off" property. If you use syndaemon to disable the touchpad while typing, the buttons now work even when the touchpad is disabled. If you don't like touchpads at all and prefer to use the trackstick only, use Option "TouchpadOff" "1". This will disable everything but physical clicks on the touchpad.

On that note I'd also like to mention another touchpad bug that was fixed in the recent weeks: plenty of users reported synaptics having a finger stuck after suspend/resume or sometimes even after logging in. This was an elusive bug and finally tracked down to a mishandling of SYN_DROPPED events in synaptics 1.7 and libevdev. I won't provide a fix for synaptics 1.7 but we've fixed libevdev - please use synaptics 1.8 RC1 or later and libevdev 1.1 RC1 or later.

Update 30 Apr: If the INPUT_PROP_TOPBUTTONPAD is not available on your kernel, you can use DMI matching through udev rules. PNPID matching requires a new kernel patch as well, at which point you might as well rely on the INPUT_PROP_TOPBUTTONPAD property. An example for udev rules that we used in Fedora is below:

ATTR{[dmi/id]product_version}=="*T540*", ENV{ID_INPUT.tags}="top_softwarebutton_area"
and with the matching xorg.conf snippet:
Section "InputClass"
        Identifier "Lenovo T540 trackstick software button buttons"
        MatchTag "top_softwarebutton_area"
        Option "HasSecondarySoftButtons" "on"
        # If you dont have the kernel patches for your touchpad 
        # to fix the min/max ranges, you need to use absolute coordinates
        # Option "SecondarySoftButtonAreas" "3363 0 0 2280 2717 3362 0 2280"
        Option "SecondarySoftButtonAreas" "58% 0 0 8% 42% 58% 0 8%"
EndSection
Update 30 Apr: For those touchpads that already have the kernel fix to adjust the min/max range, simply specifying the buttons in % of the touchpad dimensions is sufficient. For all other touchpads, you'll need to use absolute coordinates.

Fedora users: everything is being built in rawhide Update 30 Apr:, F20 and F19. The COPR listed in an earlier version of this post is not available anymore.